Saturday, December 4, 2010

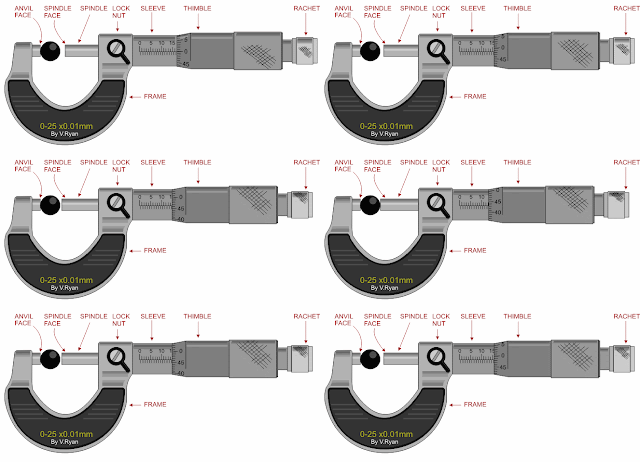
micrometer screw


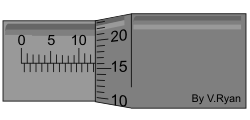
Using the first example seen below:

1. Read the scale on the sleeve. The example clearly shows12 mm divisions.

2. Still reading the scale on the sleeve, a further ½ mm (0.5) measurement can be seen on the bottom half of the scale. The measurement now reads 12.5mm.

3. Finally, the thimble scale shows 16 full divisions (these are hundredths of a mm).

The final measurement is 12.5mm + 0.16mm = 12.66


other example

Sleeves full read = 16 mm
Sleeves 1/2 read = 0 mm
Timble read = 0.35 mm
Total Measurement = 16.35 mm

Friday, December 3, 2010

Vernier Calipers

The vernier caliper is used in length measurements to gain an additional digit of accuracy compared to a simple ruler


The Vernier calliper consists of a main scale fitted with a jaw at one end.
Another jaw, containing the vernier scale, moves over the main scale. 
When the two jaws are in contact, the zero of the main scale and the zero of the vernier scale should coincide. If both the zeros do not coincide, there will be a positive or negative zero error.

Record the position of zero of the vernier scale on the main scale (3.2 cm in figure below).

 Angka nol di vernier scale menunjukkan ke angka 3.2 cm dan garis sejajar antara main scale dan  vernier scale sejajar di garis ke 3 sehingga yang hasil yang dibaca adalah

3.2 cm + 0.03 cm = 3.23 cm

To measure the inner and outer diameter of a hollow cylinder or ring, inner and outer callipers are used. Take measurements by the two methods as shown in figure above.